Showing posts with label Punches. Show all posts

Friday, January 31, 2014

Photo Stacks - Christmas


This is the 4th and last (for this project) post about my photo stacks.  As mentioned in the last few posts the details on how to make this style of phot stack is in my first post - Photo Stacks - Boy Themes.

This post is just showing the final two which are Christmas themed.  

Papers are by Fancy Pants:

Happy Holidays - Tree Lot
Happy Holidays - Snowfall
Happy Holidays - Festive

Also used in these photo stacks  - Clear Acetate and rub on's.

The scoring for the Acetate was @ 3" on the 12' side - I then used the clear layer on top and added a rub on  - love the effect!

Otherwise same deal as the others, just mixed up the pages and reversed the sides and viola!  Unique and fun photo stacks ready to capture Christmas memories.

I hope you enjoyed checking out my photo stacks...am still considering whether to do a you-tube showing detail for each page - we'll see.

I can say this was fun and quick and I now have lots of Photo stacks ready for use.

Keep smiling something crafty could happen today.

Elle


Photo Stacks - Pretty Girl


In my continuing effort to catch up on the projects I have been working on, here is the 3rd installment of my photo stacks project.  For details on how they were made visit my blog post Photo Stacks - Boy Themes.

This post is showing of the 2 girly themed stack that resulted from my efforts.

Papers by Fancy Pants:

Dancing Girl - Dancing Girl
Dancing Girl - Tutu
Dancing Girl - Hip Hop

The same three sheets of paper were used to make both stacks.  The papers were reversed and the order changed to give them a different look and feel.  I had lots of fun creating funky edges on these two.  Simple, fresh and girly...  They will be fun to use in a future project.

Thanks for stopping by to check out my Photo Stack projects.

Keep smiling something crafty could happen today.

Elle


Photo Stacks - School and more


This post is a follow on from my post about how to make the photo stacks...so if you missed that one and want to know how they are made look for my post about Photo Stacks - Boy Themes.

The top photo stack is sort of school themed, mostly because I put the paper with the words 'Spelling' on top.   I used the same papers in a different order for the next one and it doesn't look at all school like. Any ways, I have old school photos so I can see where this one might be used.  I also left this one without any punches or edging.  I wanted to have one that was nice and plain...lol.

For both the stack above and below I used papers by Fancy Pants - All Fall: Spelling, Recent, Fall Splendor.


I love how you can just put the papers in a different order and the photo stack looks completely different.  The other thing that gives this stack a different appearance is the use of punches and dies, each page has a decorative edge which I think gives it a great finish. 


Both of the above photo stacks where made with the following papers:

Fancy Pants - Delight: Garden, Bubble, Potpourri

I think these two would be great for a birthday or some party type theme.  Cant wait to see how (and when) they get used!

Again I just mixed up the order of the pages and in some cases reversed the paper and instantly a different look.  Add the variety of punches and dies and you can come up with some pretty cool photo stacks - at least I think so.

Hope you enjoyed this look at my photo stack mania..two more posts to come with the rest of my completed 'Stacks'

Keep smiling something crafty could happen today.

Elle


Photo Stacks - Boy Themes


Inspired by Heidi Swap  (link here: https://www.youtube.com/watch?v=MhOvgFNvJy4) and her use of Photo stacks in her memory folders, I though this might be a away for me to capture more photos on a scrap book page.

So... I went to my 12x12 paper stash and grabbed a stack of papers, then I sorted my papers into bundles of three.

Next I took my paper cutter and cut all the papers to 6' x12'.

Keeping 3 sheets of 6"x12" per stack I then set about scoring the papers to create a graduated effect.  I tried a few measurements but the one that worked best fro me was to score as follows:

On the 12' side score:

1st sheet @3.5"
2nd sheet @4.5"
3rd Sheet @5.5"

Fold, stack and then either staple or sew - I sewed mine, and it was easy peasy.  Finally decorate to taste and style.  I used the envelope punch board to create some tabs and otherwise used all sorts of punches to create variety on my photo stacks - Note I made heaps and it really didn't take that long...more posts to follow with pictures of the others.

So, the photo stack above has two sheets of paper and one sheet of Stampin up vellum.

The papers used for for both the boy stacks were:

Fancy Pants - Rough and Tough: All Star, and Wishing Star

And here is the second stack...the papers are ordered differently and I added a layer of Kraft to this one for more variety.

The awesome Chevron punch used on these two stacks is a Stampin Up punch - I want it!  (Note - I used this one at a friends house).


And here is a little picture of my very old sewing machine...I have had this little baby since I was bout 8yrds old.  After I wiped the dust off and threaded up the needle it was clear sailing with the sewing.


The photo stacks are now ready to be added to any project or used as they are and each has lots of space for photos.

Thanks for visiting my blog today.

Keep smiling something crafty could happen today.

Elle

Wednesday, November 27, 2013

Junk Journal - The journey to 2013


Hey...More about my junk journal journey - This is a big post as I detail my smash book, junk journal journey.

For my first smash book (that's what it started as) I used a cheap art book, I think it cost 2 dollars.  It had a nasty black plastic cover.

To make it more mine I covered the cover with tissue paper and lost of white pearlised paint and a big ribbon which I also painted.  That's where I left the front cover...as least for now!

On the inside (and I did this much later after I had been using the book a while) I spritzed with some Lindy's Stamp gang sprays...well actually on the inside cover I dripped the spray on more then sprayed...but on the back cover I sprayed.

On the first page I made a note that this was my first smash book and that it would hold anything that I couldn't be bothered to scrap.  And that could be anything...which you can see from wrapping paper from a gift to a metro pass.  And I didnt give any thought to keeping things in order.  AS I found stuff it went in.  Witch was a great chance to pop in little memories about the items.


Even from early on some pages I really like and others I wished could be better...but the purpose of this was to not lose the little mementos I had kept.  And I started to enjoy writing the stories that went with them,. 

About Now we also decide to make a big move, and started cleaning out the house ready for packing...this resulted in two things.  Heaps more stuff for the book and the realization I am a pack rat..sigh 


Even as the pile of of old bits and bobs grew, I was creating new moments as we painted the house and made arrangements to move and that's when this started to evolve into what I am calling a junk journal.  I use that phrase to describe the adhoc nature of capturing mementos from the past while noting current happenings.

One page might be a receipt from Girl Guides camp (a long time ago..) and it could be right next to a ticket from a movie a few years back.

I found myself popping the current days polaroid picture (I love the instant gratification), a the receipt for garden supplies with notes about the progress of our plans in the book in between pages that had things from trips a few years ago.


I kept a copy of an old bank statement and one of my early pay slips, and the junk journal gave me a quick place to record the the history of the document or the memory it brought back. 

Where do you keep old pet records...some of my mine found a way into this book and golly it felt good giving them a home.


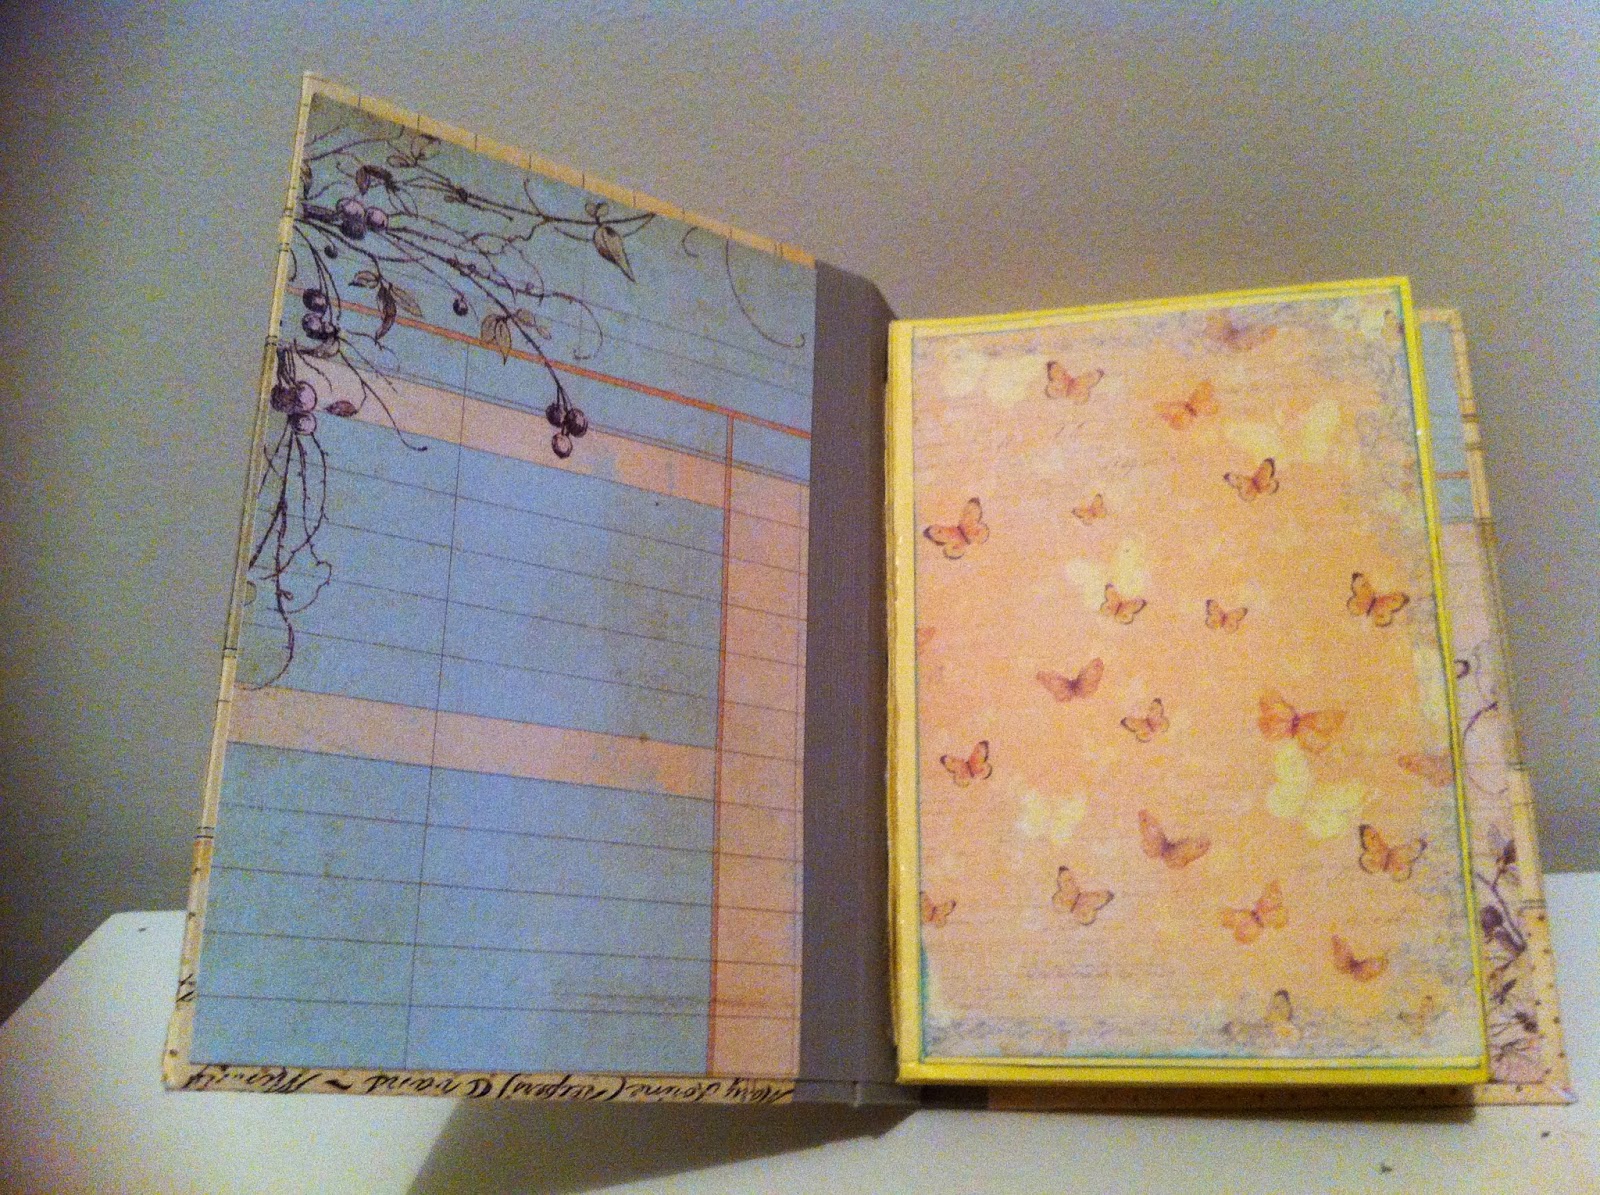
I mentioned in a previous post how my junk journal has also become my first art book...and I have to say the pages with the pre prepped backgrounds really pop.

Lost of pages are multi layer, ie things open to show more...

Since I started this journey I find myself keeping more small things that I can quickly pop in with notes to remind me why I kept it.

I think my next junk journal will be more current (I think most of my old keepsakes are pretty close to in, or will be int he last few pages in the book) but I really loved  this journey and the memories it let me relive.

I would recommend Smash booking or junk journal to anyone.  It is fun in a different way to scrap booking.

I am already working on creating the basis for my next junk journal...it will be in a post soon.

Thanks for popping past and if I helped inspire even one person to try this journey I will feel pretty awesome.

Happy craftin!
Elle

Smash Book / Junk Journal - Art Pages


I am fairly new to smash book or journaling.  But over the last several months have got much more involved. 

But this is about how my smash booking has revolved into a junk journal and an art book.

When I started I stuck my bits and bobs on the blank pages.  But then I started thinking those pages needed a bit of a boost.

That's when I started to play around with the art book concept.   This gave me an excuse to play with no set outcome...and I did.  I filled the last few pages in this book with background that pop with colour and fun.

The pages which are all ready for my to journal lures little moment.  But the fun was in playing with my paints sprays and stencils....

Off to fill some of those pages.

Craft happy.
Elle

Friday, November 1, 2013

Mini Album - Envelope Mini


Hey!  Last weekend I managed to make some time to craft and one of the things near the top in my completely packed craft room (packing to move, everything is in boxes) was some envelopes and my ever favorite Prima Paper pads.

So, an envelope mini album evolved.

For the covers I used Prima Ledger 12x12 paper, but for all the internal pages I used a 6x6 Prima paper pad.

I kept the cover pretty simple  - I loved the paper just as it was, and as this was going to be given away I wanted to keep the outside very flat for easy shelf storage.

 I used the envelopes for the foundation  and simply covered them with paper.

 For extra pages I used the cards that came with the envelopes.
 In most cases I secured the card in to make an extra page.  But in a few cases I left it as a card insert so that the album included extra photo mats.
I added a few tags.  In the picture above I made a little tag card that is in the shape of a onsie...I was going to decorate it more but I ran out of time.


Most I kept the page decoration simple with only the decorative paper.  On some pages I added a border punch creating a holder for photos or tags.

And in other places I added a small embellishment to create a photo holder.
 Lots of space for full size photos
 In my mind As I was making this I was thinking of a friend who is about to have a baby.  And I though this paper was nice given I didn't know if it was boy or girl.
 I used Kathy Orta's hidden hinge binding method.  One thing I did note was to be careful not to join the pages all the way to the bottom of the binding as it makes the pages a little harder to lie flat.


Making an album this way is pretty quick.  I made this one in a day and that is definitely my quickest from start to finish

Thanks for popping by.

Elle


Saturday, August 17, 2013

Mini Album - USA 1: January 2013


Hey Blogger's

It's been a while since I posted.  But I have been crafting.  Finally got a chance to record a clip of the first (of probably a few) mini albums I will make to capture the memories of my trip to the USA in January of this year.

Now it's time to get the photos in...

Cheers
Elle

Tuesday, May 28, 2013

Mini Album - Baby Book


This little 6x6 Gate Fold Mini is completely inspired by Ginger of My Sister's Scrapper  http://youtu.be/-bjZ4bkUKNo.

Ginger provides super awesome instructions and I couldn't resist giving it a go.  This is also the first time I have made a mini for the purpose of giving it away.  It came together much quicker then I expected and I really liked the finished product.

The person I gave it to seemed to really like it - she has a a little girl about 3 yrs old and thought she might use it to pop a few of her pictures in.


The album has 6 pages on each side.


I used a combination of Prima's 6x6 Jack and Jill paper pad as well as some nursery rhyme papers I had from a few years back.

Each page is a pocket and I kept the pages pretty simple,


On the last page or back cover the tab can be lifted for an extra photo
 mat.

And this are the tabs I made for each pocket.  I included little journal tabs on most of these as they act as both an anchor for a photo and or a place to right a little comment.


Wednesday, April 17, 2013

OTP: Configuration Tray for Sarah


Last week one of the girls on out team decided to give notice and take a new job.  She has been such a big part of the team for the last year it is sad to see her go.  That got me thinking that I wanted to do something for her and I cam up with the idea to make a configuration tray with things that represented our time working together.

Sarah is outrageous, she loves to quilt, has a fascination with shoes and quirky clothes.  She is a gem.

I had fun making this and the finished product is soooo Sarah.  I gave it to her today.  She loved it and others at work want one now too...sigh.

The try is 7 Gypsy's, I used Stampin up paper and the embellies are odds and ends I had on hand.  The needle and thread is a die cut (xcut I think) and the Dress form is Tim Holtz decorated with tissue paper flowers.


Wednesday, November 21, 2012

Card - Wishing You


Supplies:
Martha Stewart Punch around the page, Mpress Dies, Whimsy Stamp and Die, Mazy Art Digi
Pro markers, Distress Ink Pad, Flowers, Ribbons, Hat Pin

Challenges

Dream valley challenges - Anything Goes
Paper Play Time - Anything Goes
Through the Craft room Door - Anything Goes
Crafty Cardmakers - More then One punch & or Die cut
willow sketchie challenge - Sketch provided
Stamptacular sunday challenge - Recipe Challenge
Challenges 4 everybody - Anything Goes
Paper take weekly - Ribbons or Pearls
Loves rubber stamps challenges - Fun with ribbons

Hope you all like my cute little card.

Hugs
Elle

Tuesday, August 14, 2012

Card: Creative Card Crew Challenge - Maps/Newsprint/Sheet music/Script


This weeks challenge over at the Creative Card Crew is - Maps/Newsprint/Sheet music/Script.  This challenge is sponsored by Simon Says Stamp , pop on over em out.  You should also pop over and check out the other great designs by the team...Creative Card Crew.

I had a request for a wedding card, the person who wanted the card loved this stamp, so I with their wedding card requirement and CCC's challenge in mind, here's what I ended up with.

Supplies

Stamps:  Kaiser Craft, Whimsy Stamps
Dies/Punchs:  Whimsy, Sizzix, MPress
Inks:  Distress Inks, Distress Markers
Papers:  Prima
Other, Seam binding (dyed with Distress ink), Lindys Sprints, Flowers from Wild Orchid Crafts

Sunday, July 29, 2012

Card: A little bit of fun


It's been a crazy week, trying to keep up with work and craft and still recovering from the Flu.  This card was a challenge to complete.  I just kept making small boo boo's. I add smudged ink to fix, the kraft card stock shrank when I was wetting, crumbling and drying, and many other small glitches.

But I persevered and all up and I pleased with the finished product.

There were lots of challenges that gave me inspiration for this card...will try and list them all below. Some may have already ended (I was a bit slow...sigh).


Supplies:


Cardstock:  Kaszazz Horizon, Cor'dinations, SU Whisper white, Bazzil Kraft
Colouring: Promarkers, Distress Markers, Prisma pencils
Lindys:  Smoky Saphire
Stamps:  Hot Diggity Dog; Treat's, Whimsy Ticket Sentiments
Dies:  Mpress, Memory box
Emboss Folders:  Tim Holtz
Punchs: Fiskers, EK success

Challenges:
simon says stamps challenge
totally stampalicious
use your stuff
crafts and me challenges.
simply create too
sketch saturday

Saturday, July 14, 2012

Tag: Cherish Friends


Patrice from  52 Card Pick-up  stopped by and left me a lovely comment on another tag I did and she mentioned linking it up to her current challenge.  It didn't feel right back linking, so thinking about her challenge and the new challenge this week at The Shabby Tea Room.  I went ahead and made this tag.

Supplies:

Kaszazz: Tag
Kaiser craft: Card embellies
Lace, cheese cloth and roses ribbon
Dies:  Memory box, Tim Holtz
Punchs:  Fiskers

Also used distress stickles, distress inks and you guessed it, some Lindys.  There's also a little bronze key ticked in there too.

Sunday, July 8, 2012

Tag: No 1.


I love my weekend review of all things craft.  From Friday to Sunday I review the blogs for the last week.  I try to keep up during the week but sometimes I just don't get to see all that crafty inspiration.


Any ways, in my travels this weekend I found Sarah Hurley challenges and she had a great challenge for all things textured. That got me thinking about those great techniques I learnt with Tim Holtz and well it was time to make a tag. This tag will soon make its way onto a layout but for here it is.

I used TH metal technique, which I finished with a nice spritz from a Lindys mist. I used up some of the cut outs from last time I used my notebook border punch to finish of the tissue tape edge ( which was of course distress with some distress inks. The tag itself includes metallic paint, distress inks and the aforementioned Lindys mist. The heart was a silver one that I repainted with gold metallic paint and distressed with Distress ink.
Lovin the crafty time on weekends!

Sunday, July 1, 2012

Layout: Warming Up


This layout was inspired by the current sketch challenge over at Creative Scrappers, this one is based on Sketch #214.

The layout is of my nephew James.  He and his dad popped in to show us their new Puppy, Choco.  James is often a bit overwhelmed by my labs, so it takes a little while for him to warm up to them.  In this photo is Amber my 8yr old and Choco.  Ebony must have wandered off, cos she and the pup played pretty much the whole time.

I had fun with this layout and other then turning the sketch sideways I kept pretty close to the original...

The hinge embellishment was inspired by embellishments purchased from Angelica's Little Scrap Shop.

Supplies:

Kaszazz Papers: Castaway collection
Punches:  MArtha Stewart and EK Success
Time Holts Alterations:  Tattered Banners, Hardware
Glossy Accents
Kaiser craft flowers
Lace
Butterfly: littlescrapshop
Sizzix letters

Saturday, May 12, 2012

Card: Graphic 45, slider card


I made this for a friends birthday.  She loves Graphic 45, I decided to use papers from the 'Once upon A Springtime' collection.


Supplies:

8" graphic 45 paper pad
Butterfly punch - Butterfly's inked up with Lindy's
Lindys stamp gang stains
Seam binding - inked up with Lindy's
Embellishments - Jewelry odds and ends
Stamp - happy birthday

A quick peek with the slider pulled out...


The finished product was just as I imagined.

Monday, February 27, 2012

Card: Paws for Thought

I loved the name of the challenge over at Crafty Ribbons Challenge  so much, that it is the name of this card.  The challenge made me think of this awesome Hot Diggity Stamp, I love this stamp and the pups in the picture all look so very deep in thought....

I drew a rough sketch that represented the sketchs from both Sweet Stop Sketches and Lets Capture These Sketches to see if they could work together.  I think they sorta do, lets see if the challenge owners agree.

Supplies:
Stamp:  Hot Diggity, Memories in the Making (sentiment)
Dies:  Nesties
Punch:  Paper Shapers
Pattern Paper:  October Afternoon - Thrift shop
Card Stock:  Bazzill


Challenges:
Crafty Ribbons Challenge - Challenge #13 - Paws for thought
Sweet Stop Sketches - SSS147
Lets Capture These Sketches - Challenge #12 - Critters

Sunday, February 26, 2012

Card: Purr-fect


I am loven the challenges, they give me a chance to try new things and remind me to play with old favorites.  This card is based on a sketch at Eat Sleep Stamp  and used the challenge at Penny Black at all Sorts.  I picked the bingo line Brown, Black and blue cos they are colours I don't normally put together.  And I used this stamp cos it is one of my favs.

Following is a close up of the bubbles...

And now that the racket next door that has kept us up all night has finally stopped, I am heading to bed to get a little sleep.  I am so tired I feel sick to the tummy...


Supplies:
Stamp:  Penny Black
Card Stock:  Stampin Up
Pattern Paper:  Kaiser craft
Colouring:  Distress Inks
Dies:  Nesties
Punch:  Tab - Stampin Up
Distress Stickles

Challenges:
Penny Black at all Sorts - Play Bingo ( Brown, Black & Blue)
Eat Sleep Stamp - Sketch #161

Card: Happy Times

I have been really wanting to bring more depth to my cards and other crafty projects, and am always looking for inspiration to use flowers or embellishments.  That's why one of the Blogs I follow is Let's Get Shabby.  So when I saw the latest Challenge and the rules ( Strawberries and Hearts) I thought of this stamp.  The I just had to have a go.

This one is called Happy Times, which if you look closely is in the text on the big heart in red, and on the little heart I captured "Happy".  After all who wouldn't be happy with all those strawberries.  And I figure you have to love them to carry so many at once...

Supplies:
Stamp:  House Mouse ( of course)
Papers:  October Afternoon - Thrift Shop (left overs from one of yesterdays cards)
Lace:  Stampin UP
Punches:  Hearts, Martha Stewart - Border Punch
Coloured with Distress Inks

Challenges:
Let's Get Shabby - Challenge #32: Strawberries & Hearts (any project) 


Only one.  This is a special card for a special challenge :}